- Solutions
- AI First Services
- Business Outcomes
- Industry AI Accelerators
- Insights & Resources
- About
For business management solutions email us or call 020 3004 4600
In our recent blog posts, we've covered how to create static marketing lists in Dynamics 365 and how to create dynamic marketing lists in Dynamics 365. We’ve also alluded to how you can add and manage members within those marketing lists using an Advanced Find search. In our latest tips & tricks article, we will be exploring how to create and use the Advanced Find search feature in Dynamics 365 to easily filter through the data contained in your CRM.
Don't know what Advanced Find is? Click here to read Advantage Dynamics Business Development Manager, Stephen Manley's debut article, 'Struggling with Dynamics 365 CRM? Read this'
How to create an Advanced Find search in Dynamics 365
Step 1: Choose the 'Advanced Find' option on the far right of the Command Bar (the funnel object).

Step 2: Choose 'New'.
Step 3: Underneath the 'Look For' option, choose the entity that you wish to use for your query, for the purposes of this how to guide we will select the 'Accounts' entity.
Step 4: Choose the search criteria you wish to use (see below screenshot). In the select section, choose the field on which you want to base the search. Choose your query operator (equals, does not equal, contains, does not contain etc). Then choose the data you want to filter by e.g London. Repeat Step 4 again to select the fields you want to filter by (see the next section to learn how you can collate these different filters together).
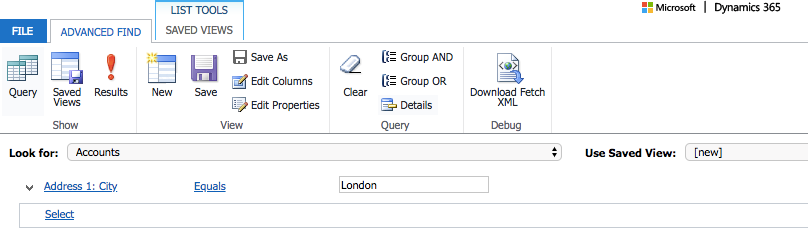
Step 5: Click on results to view the results based on your search criteria.
How to add a Search Criteria to an Advanced Find
Step 1: Within the select area, select the field on which you want to base your search (Address 1: City).
Step 2: Choose your query operator (equals).
Step 3: Fill in the data you want to narrow down the search by (Bristol).
Step 4: Collate the field rows. You can do this by using the dropdown menu next to the address 1 of London, choose 'Select'.
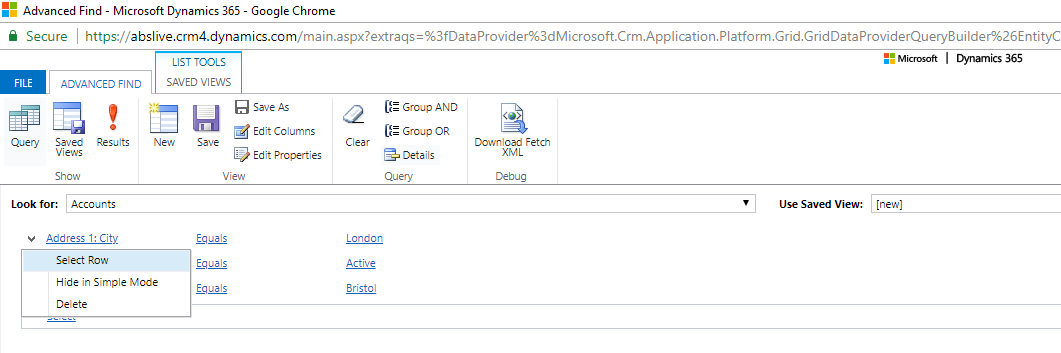
Step 5: Complete the same process again for the Bristol row so you can see that both rows have been selected.
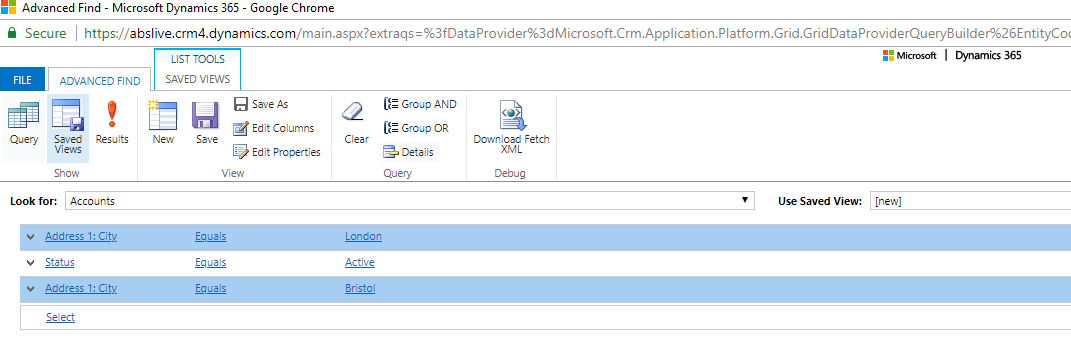
Step 6: Choose 'Group OR' in the ribbon.
Step 7: Click on 'Results'. The results will now show all accounts matching both London and Bristol.
How to add and remove columns
Step 1: From your main query screen, select 'Edit Columns' in the ribbon (Choose the 'Advanced Find' tab if you're in the results section).
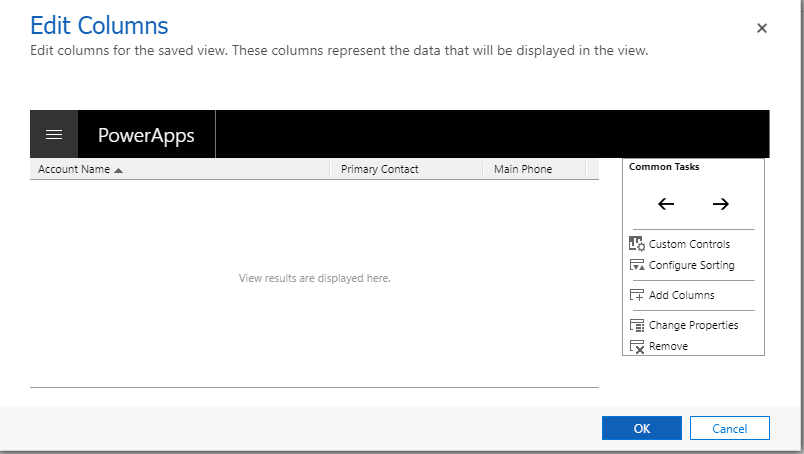
Step 2: To shift the columns from left to right, choose the column then use the black arrows to move the column left or right.
Step 3: To configure sorting, you can choose either ascending or descending depending on your requirements through the 'Configure Sorting' option.
Step 4: If you want to make changes to the properties, select the 'Change Properties' option which will allow you to increase the width or narrow your columns.
Step 5: To remove a column, select the column and then select 'Remove'.
Step 6: Once you have made all your changes, select 'OK'. Then from the main query screen, go to 'Save As' in the ribbon.
Step 7: Choose a suitable name or description then click 'OK'.
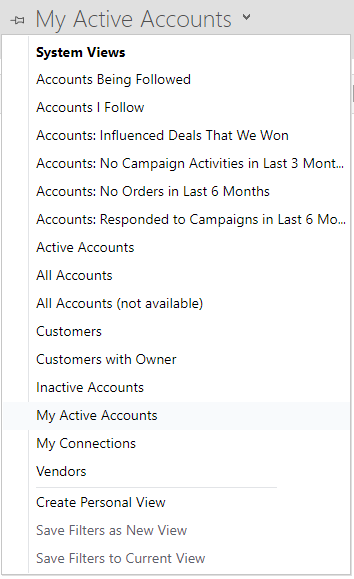
How to save Advanced Finds (Creating Personal Views)
The view you have just saved will now be visible under the entity you created it. In our example, we created this personal view under the accounts entity. You can find this by navigating your way to the accounts area from the homepage of your CRM.
How to share personal views in Dynamics 365
Step 1: Choose the 'Advanced Find' option from your main Command Bar (the funnel object).
Step 2: Select 'Saved Views'.
Step 3: Pick the view that you want to share with your colleagues.
Step 4: Choose 'Share' in the ribbon
How to export your records to Microsoft Excel
Exporting records into Microsoft Excel can be completed from within any view. You can export records to Excel in the following ways:
Open in Excel Online – Allows you to quickly analyse data and make changes from within your CRM.
Static – Allows you to create a copy in an Excel form. These exports are limited to what data is visible at the time of the export.
Dynamic – Allows you to export data with a link straight back to the CRM server. You can update data within the Excel spreadsheet which can be updated whenever it is open. You will need Outlook installed for this option.
Dynamics Pivot Table – Works in a similar way to the dynamic export option but exports the data in a pivot table format. You will need Outlook installed for this option.
If your business is finding it hard to use the Advanced Find feature within Dynamics 365, are not sure how best to navigate your Dynamics 365 system or require some additional advice/consultation or bespoke CRM training, then talk to Advantage today to discuss your specific requirements with us.
