- Solutions
- AI First Services
- Business Outcomes
- Industry AI Accelerators
- Insights & Resources
- About
For business management solutions email us or call 020 3004 4600
If you are a regular user of a finance system such as Dynamics NAV within your business, you will want to know how you can get the very most out of that system.
In Dynamics NAV, there is functionality that can help you to account for additional purchase and sales costs, such as the following:
For inventory purchases, these additional costs should be included in inventory valuations and the cost of goods sold. Additional sales costs are not included in the value of inventory but can be recorded as expenses against sales to improve the accuracy of profit calculations.
In Dynamics NAV, these additional costs are addressed through its Item Charges functionality. You can use this functionality to post item charges even after you post all related purchase or sales documents.
You will need to setup item charge records before you can use these on purchase and sales documents. You must set up item charge numbers for the different types of item charges, including to which G/L accounts costs related to sales, purchases, and inventory adjustments are posted to. For both purchase and sales documents, you can assign an item charge in two ways:
In our latest tips and tricks article, we will take you through how to use Item Charges in Microsoft Dynamics NAV. This can be achieved in the following steps:
Step 1: Login into your NAV solution, then make your way to the Item Charges Setup by going to ‘Departments’ followed by ‘Financial Management’ then ‘Inventory’ and ‘Setup’.
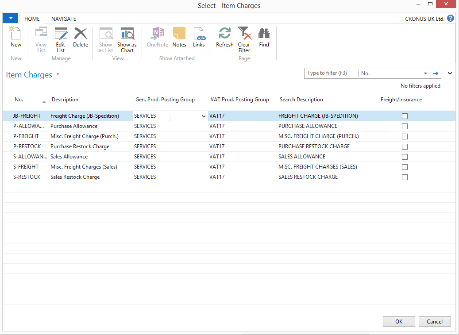
Step 2: Once this window opens, you will need to define which Item Charges can be used.
Step 3: After you have setup these Item Charges, you can then use them as ‘Charge (Item)’.

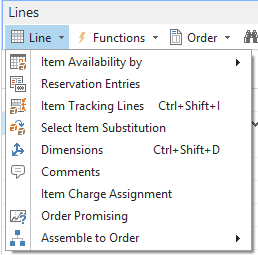
Step 4: Before you can do this, you will need to define how this Item Charge will be spread across the items within the purchase, transfer or sales documents. You can do this by selecting the ‘Line’ button followed by ‘Item Charge Assignment’.
Step 5: This will open the ‘Item Charge Assignment’ Worksheet which will highlight any unassigned item charges.
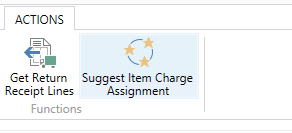
Step 6: From this, you can easily select the ‘Suggest Item Charge Assignment’ button in the ribbon.
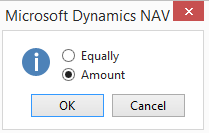
Step 7: Once you have done this, it will then ask you whether you want to split the item charge across the items equally or by amount. Once you have decided on which option you want please select ‘OK’.
Step 8: After you have done the above, then select ‘OK’ at the bottom of the worksheet which will then allow you to process orders in the normal way but item charges will be posted to your defined accounts as specified by your general posting setup.
If you are unsure how to use the function discussed above, need assistance on how to get the most out of your current NAV solution, are looking to upgrade to Business Central or require further NAV support or bespoke NAV training then please call our team of experts today who will be more than happy to help.
If you would like to receive similar articles to the above straight into your inbox then please sign up to our mailing list.
