- Solutions
- AI First Services
- Business Outcomes
- Industry AI Accelerators
- Insights & Resources
- About
For business management solutions email us or call 020 3004 4600
If your business is using Dynamics 365, it is more than likely that at some point you will come across duplicate records or out of date data which will need to be addressed. In our latest tips and tricks article, we will take you through the process of how to create and use duplicate detection rules within your Dynamics 365 solution.
First of all, it is important to note that even after you have setup duplicate detection rules to reduce the numbers of duplicate records, it doesn't mean that duplicate records can't be added to your CRM. Therefore, it is advisable to setup regular schedules (after you have setup your duplicate detection rules) that help you to detect duplicates before reviewing these and then deleting them from your CRM.
Need help getting started with the below? Contact us today to get started
Part A - Setting up duplicate detection rules
Before you can schedule a duplicate detection job to take place, you will need to set the criteria on how duplicate records will be classified. For example, you may wish to set a rule that if two email addresses are the same they will be marked as duplicate entries. In order to set the criteria for duplicate detection, you will need to setup the duplicate detection rules first which you can do through the following steps:
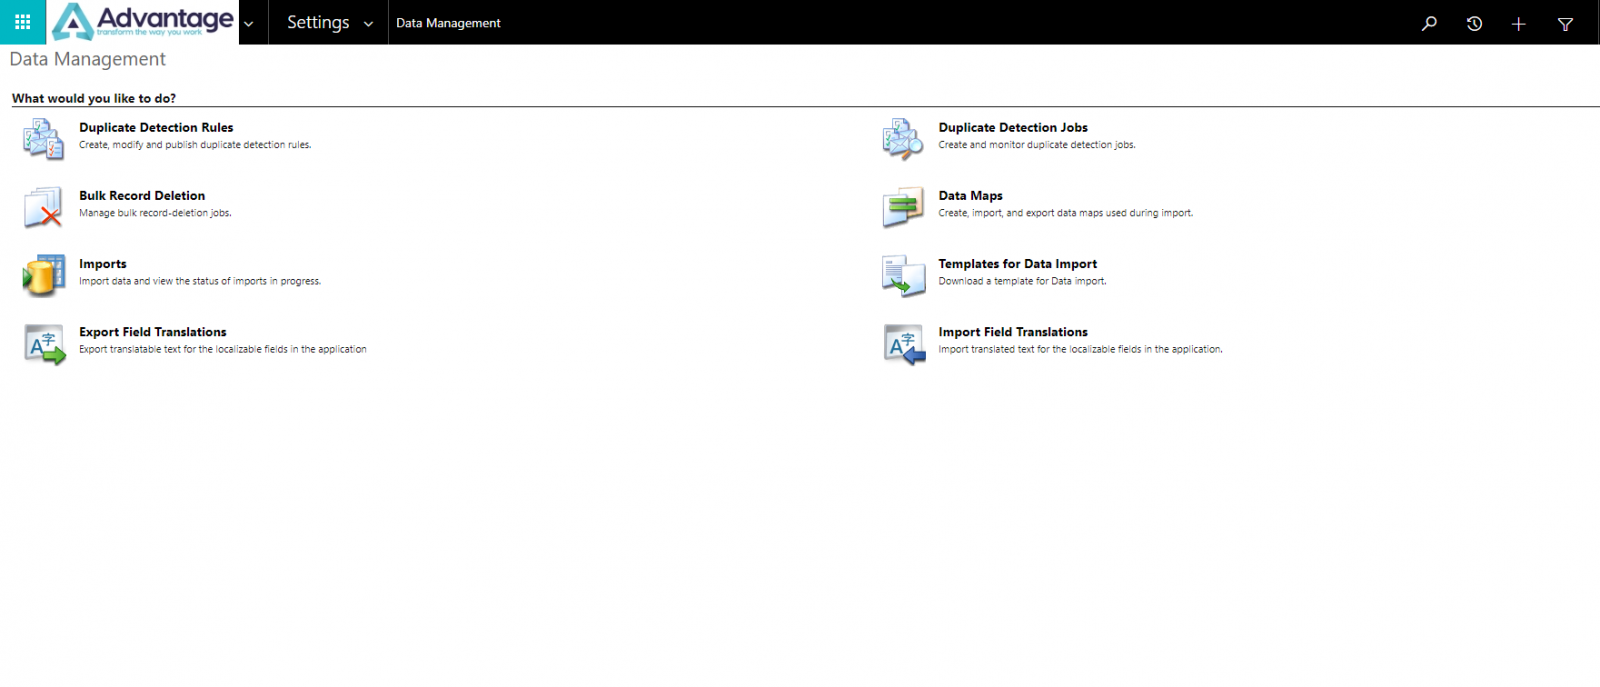
Step 1: Go to your Dynamics 365 system then go to 'Settings' then select 'Data Management' and go to 'Duplicate Detection Rules'.
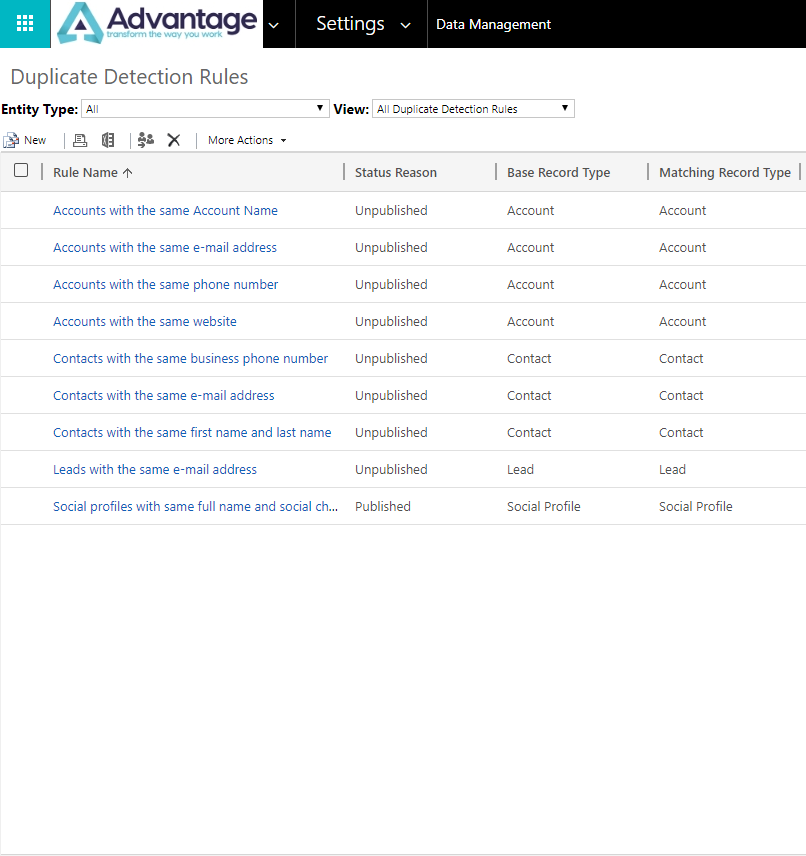
Step 2: In the top left corner of this section, select 'New'.
Step 3: Fill the details for the duplicate detection rule that you would like to create which includes the following elements:
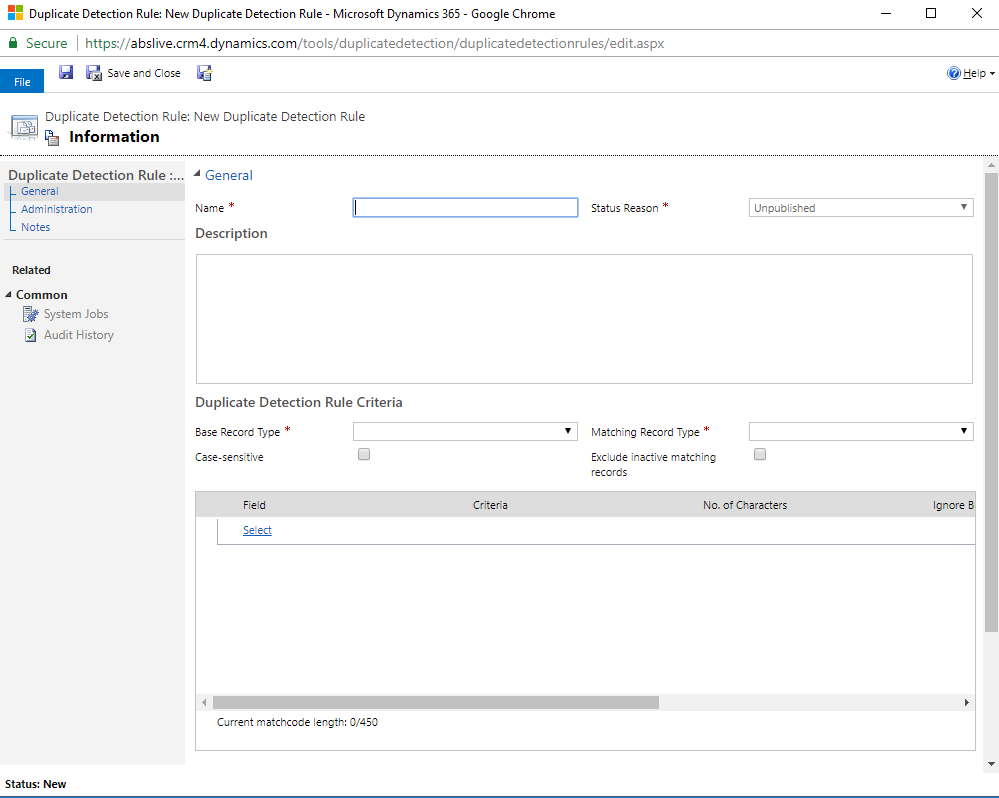
Step 4: Click 'Save and Close' after you have filled in all the relevant details.
Step 5: To make the new or changed duplicate detection rule usable, select the rule you have created, and then select 'Publish'.
Part B - Updating your duplicate detection settings
After completing Part A, you will need to make sure that your duplicate detection settings are enabled (you can also disable these if required) before you can setup a duplicate detection job using your duplicate detection rule.
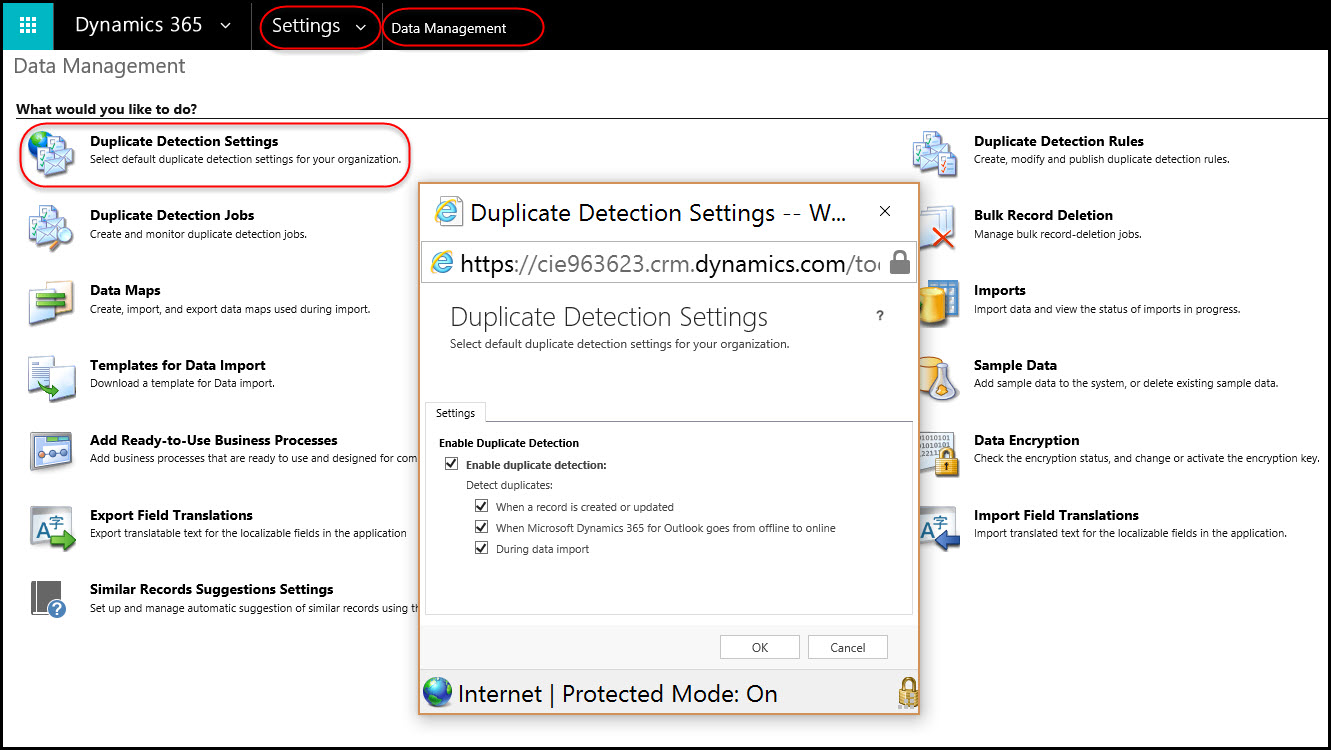
Step 1: Go to 'Settings' followed by 'Data Management' and then choose 'Duplicate Detection Settings' and tick all the boxes then click 'OK'.
Get some expert Dynamics 365 consultancy today to help you with the above
Part C – Setting up a duplicate detection job
After completing Part B, you are now ready to create your duplicate detection job which can be done through the following steps:
Step 1: In Dynamics 365, go to 'Settings' followed by 'Data Management' then select 'Duplicate Detection Jobs' and click on 'New' in the top left corner. This will bring up the Duplicate Detection Wizard which will help you to create the job needed for checking duplicate records. From here, select 'Next'.
Step 2: When you get to the next stage, in the 'Look for' drop-down list select the duplicate detection rule which you created earlier.

Step 3: Select 'Next' then either accept the default name or give it your own name. After this, then fill in the start time for the job and how often you would like this to run in days (To run this job on a daily basis put '1').
Step 4: If you want to receive an email notification when the job has been completed you can do so by checking the 'Email Options' box. After this, select 'Next' and then 'Submit'.
Part D – Merging duplicate records
After completing Part C, you can then review the results and from here you can view the duplicate records. You can do this by following these steps:
Step 1: Within the 'Duplicate Detection Jobs' section double click on the job you created to bring up the results and then choose 'View Duplicates' on the left hand side.
Step 2: To merge duplicate records, select one of the duplicate records in the top table which will then show the duplicate in the table below it. From here select 'Merge' in the toolbar.
Step 3: Choose the master record i.e the one that you would like to keep. From here, pick the individual fields or sections that should be kept on the master record.
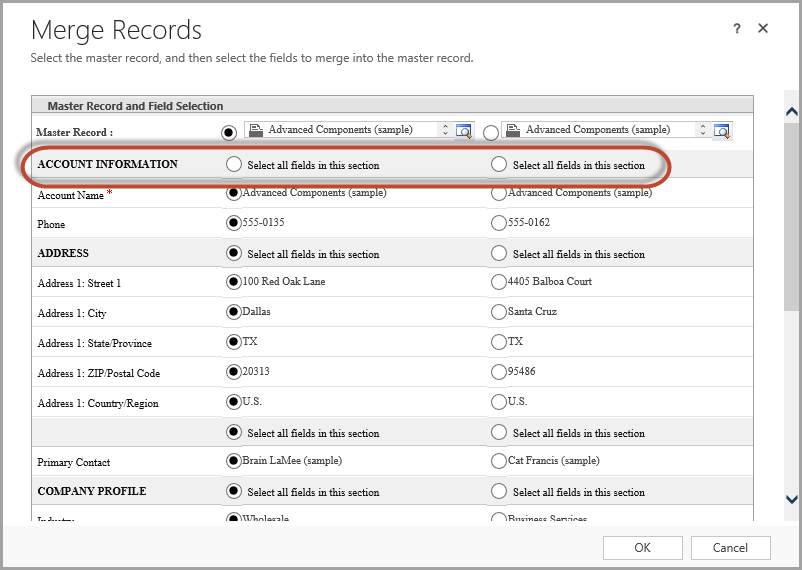
Step 4: After you have decided on the above, select 'OK' to complete the merge process.
If you are having trouble with your duplicate detection rules or require some additional Dynamics 365 support or training, then please contact Advantage today to discuss your specific business requirements.
If you would be interested in hearing more about our 'how to' guides, please sign up to our marketing emails.
