- Solutions
- AI First Services
- Business Outcomes
- Industry AI Accelerators
- Insights & Resources
- About
For business management solutions email us or call 020 3004 4600
The best way to view SharePoint if you are relatively new to it (we covered the basics in a previous blog), is that its organised in a similar way to a physical library where you have categories and subcategories which allow you to find what you are looking for.
The same principle applies in SharePoint where all your organisation’s information is broken down into different functions and then stored in sites and subsites. You could also say that SharePoint Lists and Libraries are like the physical shelves you find in a library. Taking this one step further, you could also say that SharePoint columns are like the systems used in a library to ensure that books are placed in the correct place.
In light of the fact that columns are useful, they can also be a hindrance as they only let you apply specific determined metadata/column types. In our latest tips and tricks article, we will be taking these ideas further by firstly covering what a site column in SharePoint is then we will provide you with a step by step guide on how to create and use a site column in Microsoft SharePoint.
So for those that don’t know what a site column in Microsoft SharePoint is?
Essentially a site column is a reusable column definition or template that you can add to multiple lists across multiple SharePoint sites. These can be particularly useful if you are looking to ensure that your business has consistent settings across lists and libraries. From here you will be able to share the settings to cover multiple lists and libraries so you don’t need to create these settings ever again.
Let’s look at a quick example of this:
Say you define a site column which you call ‘Customer’. Users can add that column to their content types or list. This will make sure that the column uses the same attributes wherever it appears.
When you look to add an item to the list or library, you will need to fill out a form in which each column is represented by a field. This is where each field is labelled with the name of the column. If you have provided a description for the column, you will see that it appears below the field. This is helpful as you will be able to use the description to help your colleagues fill out the form by saying what information goes into the field.
How to create a site column in Microsoft SharePoint
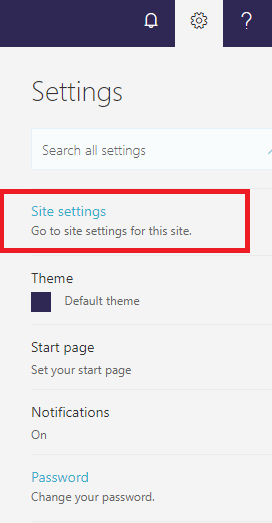
Step 1: Start the process by going into your company SharePoint account, from here select the ‘Cog’ icon in the top right-hand corner, then select the ‘Site Settings’ option.
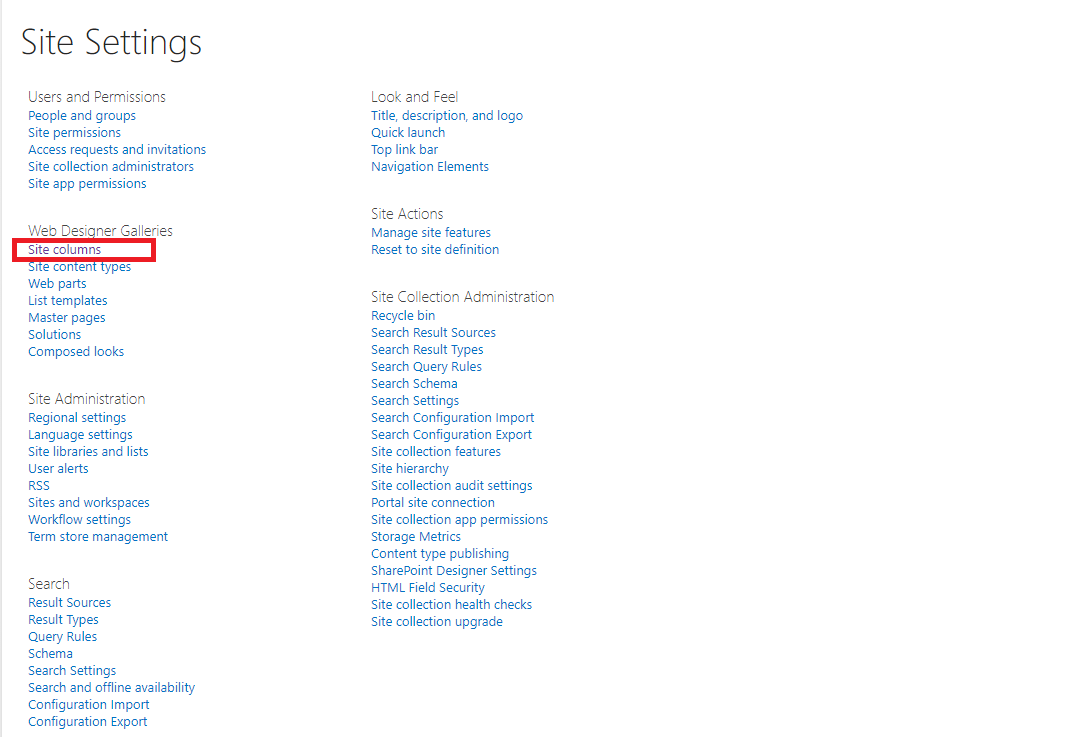
Step 2: Once the Site Settings page loads, pick the ‘Site Columns’ option.
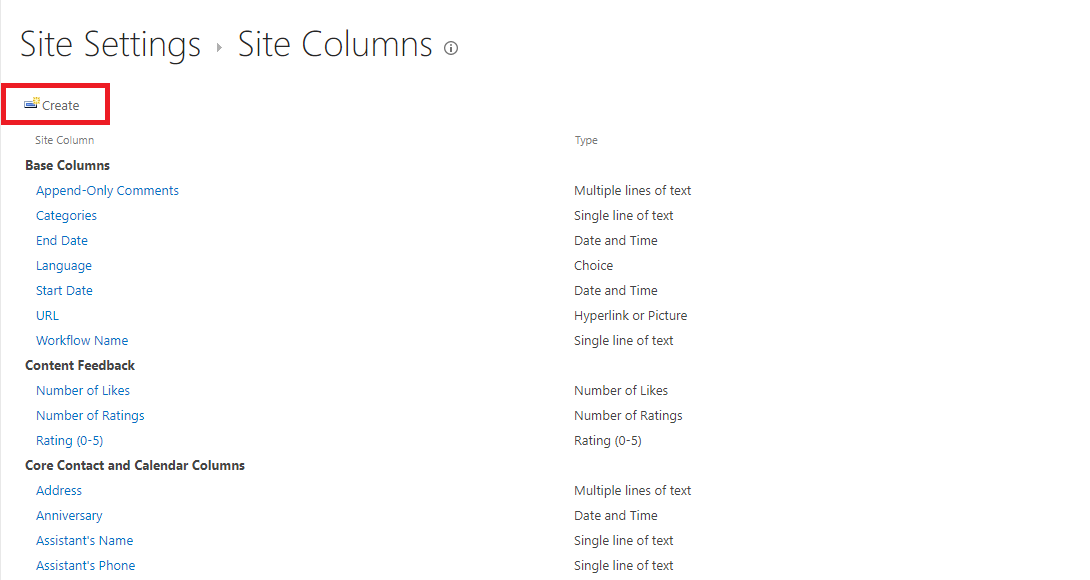
Step 3: Once this page opens, you will see that there are existing columns already created. DO NOT TOUCH THESE!
You will need to create a new site column by clicking the ‘Create’ button.
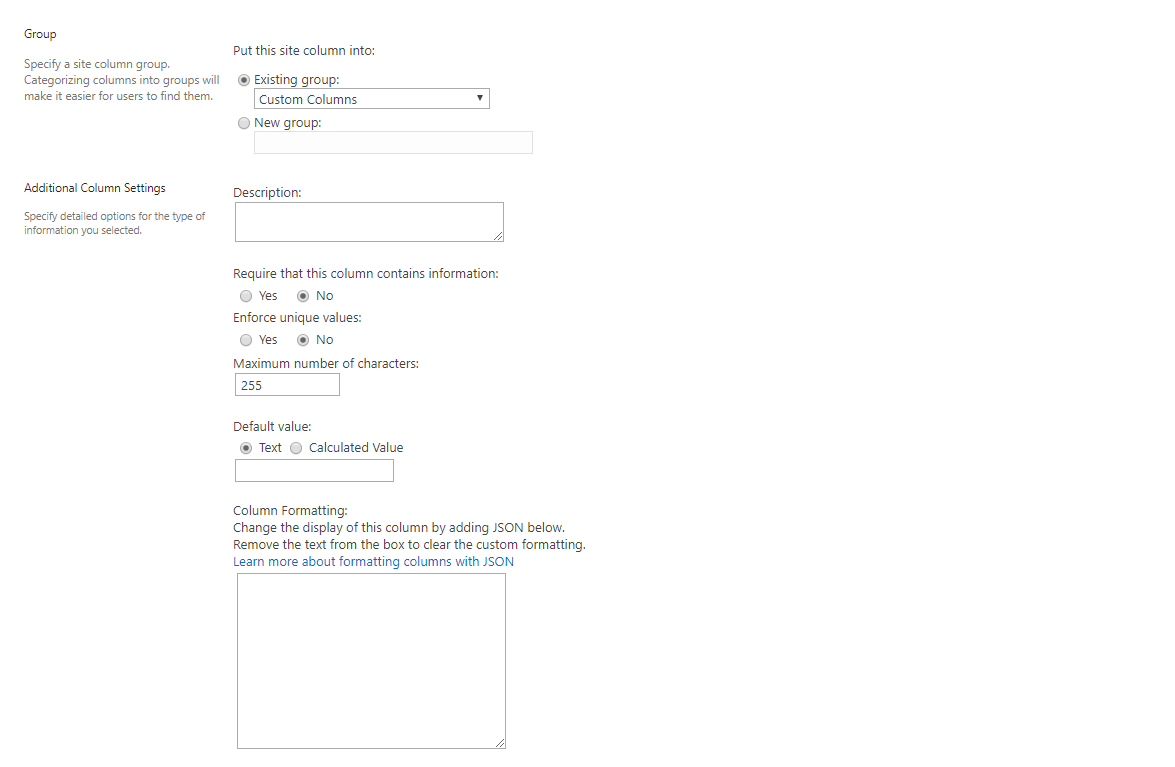
Step 4: Once here, you will then need to create the actual column and provide the details required. In our example below, we’ve created a ‘Customer Feedback’ column.
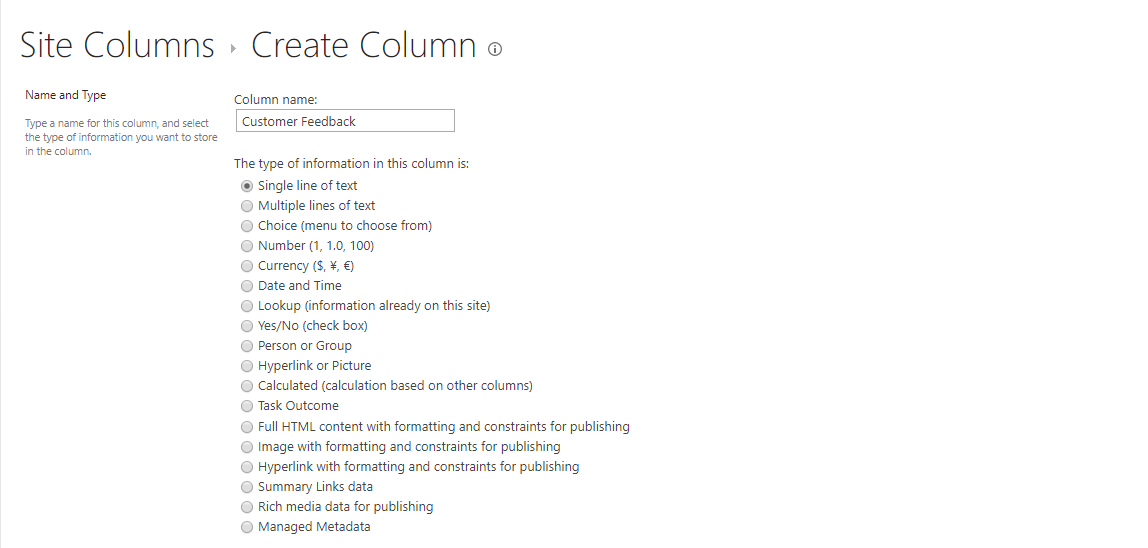
Step 5: Make sure that you add any other additional useful information which will impact how the column can be used.
Step 6: Once you have done this, select the ‘Create’ button and your column is ready to use.
How to use a site column in Microsoft SharePoint
Once you have created your site column in SharePoint, you will want to know how to use it. This can be achieved by following these steps:
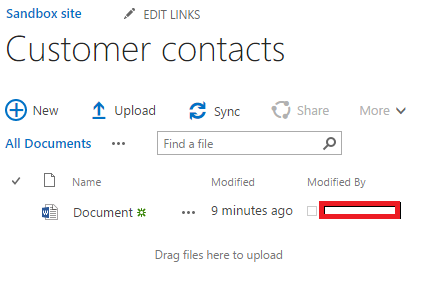
Step 1: Navigate your way to the list or library that you want to add the column to, then move to step 2.
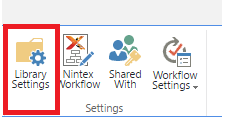
Step 2: From the main ribbon, pick the ‘Library Settings’ option
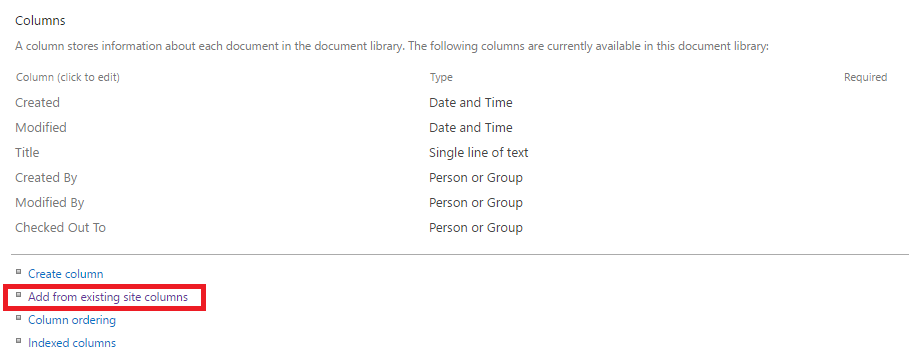
Step 3: Once you have done this, pick the ‘add from existing site columns’ option.
Step 4: Once you have done this, all you have to do is add the site columns you have created and you are done!
If your business is looking for help with implementing Microsoft SharePoint or are looking for additional IT consulting or more IT support then get in touch with our SharePoint experts today.
Want to receive more tips and tricks like the above? Then why not sign up to our mailing list to get these tips and others like it delivered straight into your inbox!
