- Solutions
- AI First Services
- Business Outcomes
- Industry AI Accelerators
- Insights & Resources
- About
For business management solutions email us or call 020 3004 4600
If you use Dynamics GP regularly, you will understand that you aren’t able to void or alter an entry that has already been posted to the General Ledger. However, you are able to rectify this by posting a new entry to replace the incorrect one.
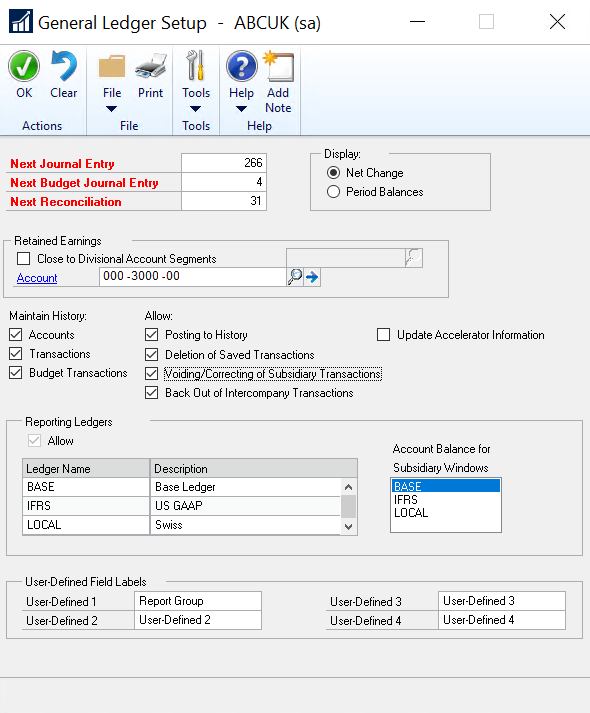
Luckily, Dynamics GP has built in functionality which allows you to use Back Out or Back Out and Correct Entries. You can access this functionality by simply selecting the ‘Correct’ button at the top of your General Journal Transaction window. However, as a system default, you will only be able to correct journals created from within the General Ledger. If the entry was from a subsidiary ledger, such as the Payables Transaction Entry, you will need to amend the General Ledger Setup Options before you start, so that it allows you to either correct or void the subsidiary transactions.
In this Tips and Tricks article, we will show you the steps that you need to take to correct an entry that has already been posted in Dynamics GP.
Step 1: If the batch has come from a subsidiary such as Payables, make sure that the General Ledger Setup is set up to allow Voiding/Correcting of Subsidiary Transactions. In order to do this, you will need to login to your GP Solution, then go to ‘Tools’ followed by ‘Setup’ then ‘Financial’ and then ‘General Ledger’.
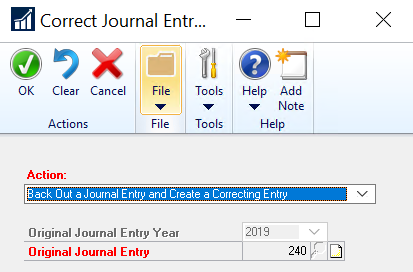
Step 2: After you have done this, go to the General Journal Transaction Entry window, by navigating to ‘Transactions’ then ‘Financial’ and selecting ‘General Entry’. Once here, select the ‘Correct’ button at the top of the window.
Within the Action field, select ‘Back out a journal entry and create a correcting entry’. From here, simply enter the financial year and the original journal entry that you want to correct.
If the entry originally came in from a subsidiary such as Payables, you will receive a notification saying that the transaction was entered in the subsidiary ledger and it will ask you if you wish to continue.
Simply select the ‘Yes’ button to continue followed by ‘OK’ on the correct journal entry window.
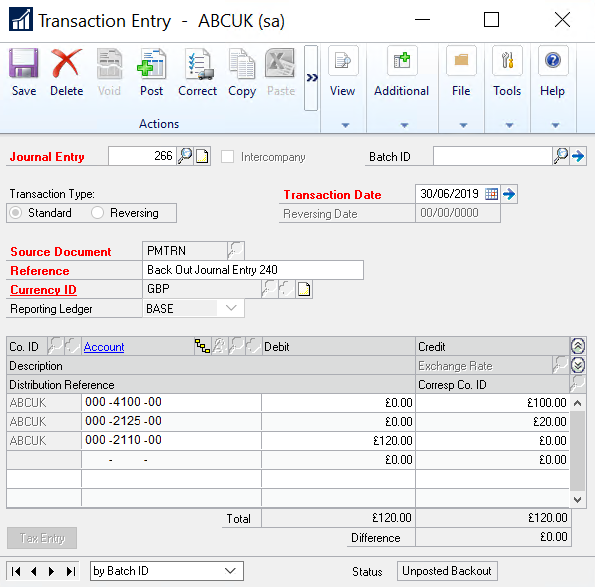
At this point, the Transaction Entry screen will be automatically populated with a ‘Back Out Journal’, being an exact copy of the original journal but with the Debit and Credit entries reversed. It will be referenced: Back Out Journal Entry #### (with ##### being the number you are correcting). This is editable if needed but the default reference is useful for audit trail purposes. Post or Save the entry to a batch. You will, of course, need to check that the financial period related to the date of the transaction is open.
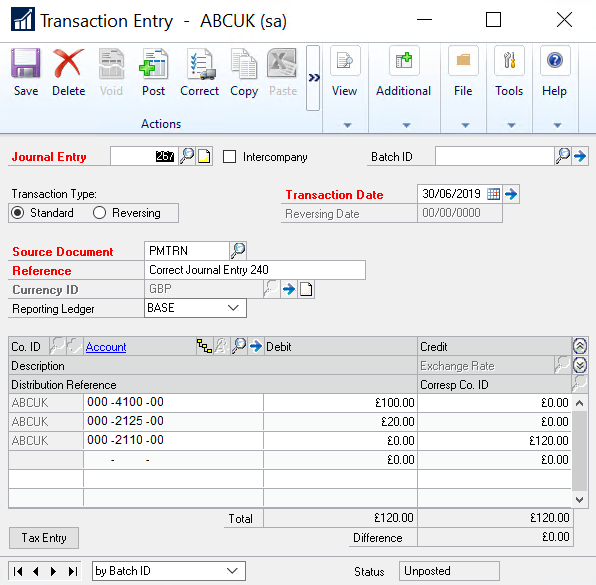
Once Saved or Posted, the screen automatically populates with a second journal, with the entries being exactly the same as the original. All fields are editable, allowing the correction to take place. The Journal will be referenced Correct Journal Entry ##### (with ##### being the journal number you are correcting). You may typically be changing the transaction date, the GL coding or the values. You can then Post or Save these transactions.
If you are looking for more assistance on how to complete the above or need help with any other posting related query, require a tailored GP support plan, tailored GP consultancy or looking to upgrade your existing ERP solution then get in touch with our team of experts today to discuss your specific business needs.
If you want to receive articles similar to the above, then please sign up to our mailing list today.
