- Solutions
- AI First Services
- Business Outcomes
- Industry AI Accelerators
- Insights & Resources
- About
For business management solutions email us or call 020 3004 4600
If you use Dynamics GP on a day to day basis, you will want to make use of all the latest tips and tricks that will make your job easier and help you to improve both your overall efficiency and productivity.
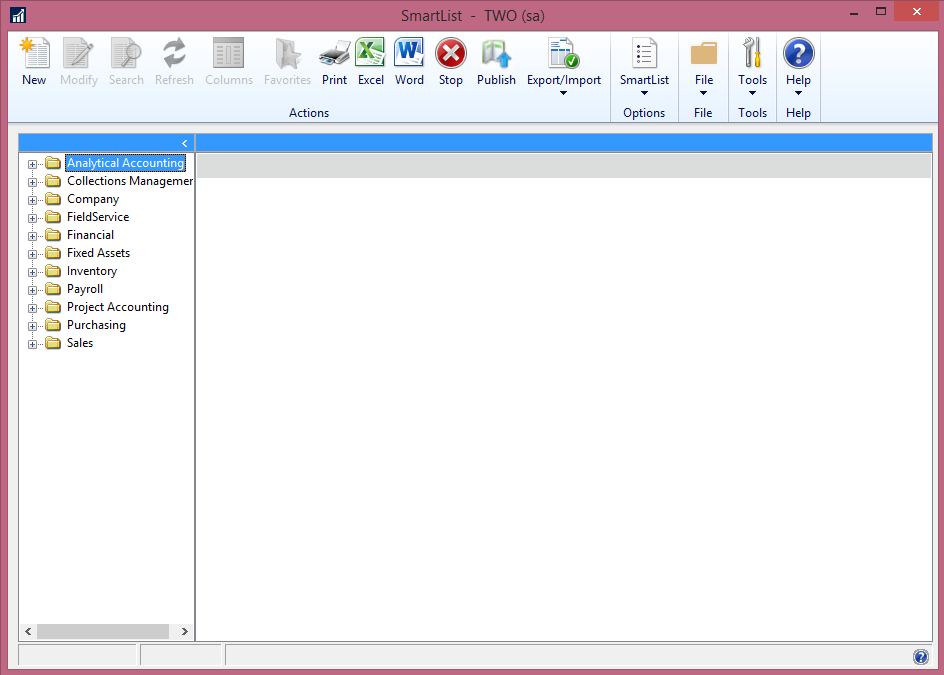
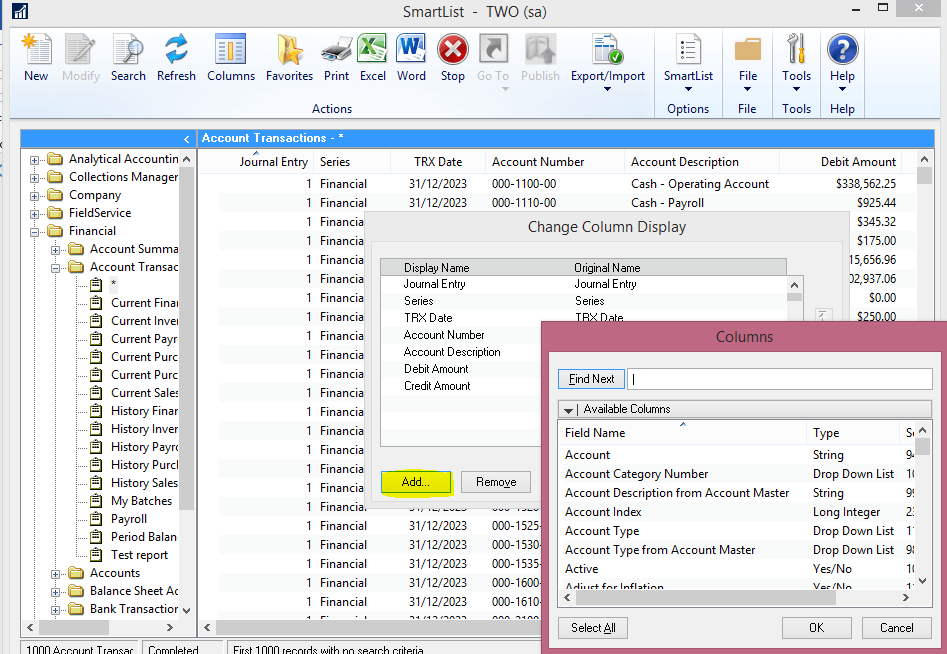
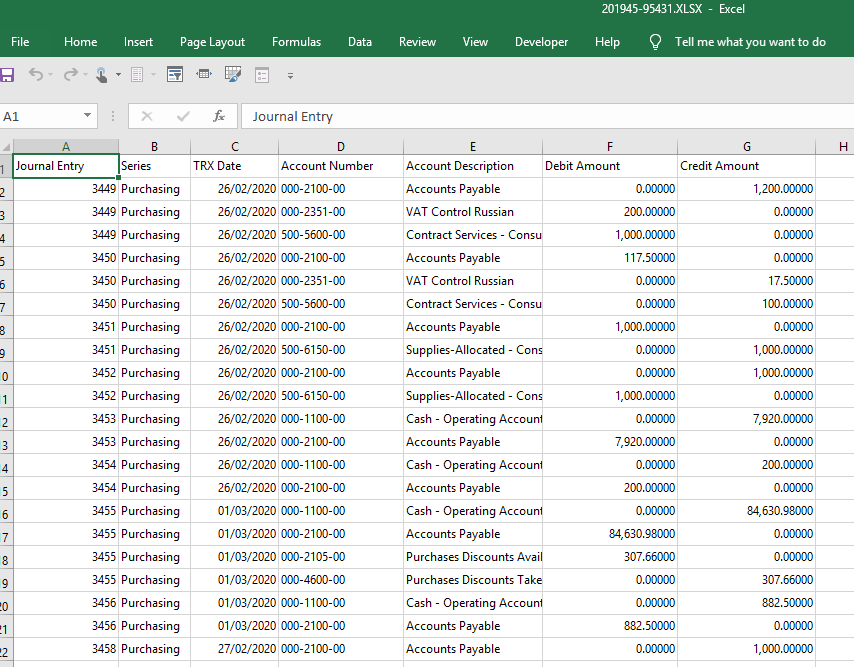
One such useful function in Dynamics GP can be found among the standard lists under the SmartList tool which is called the Account Transactions report. This standard list can be easily changed to provide users with a more in depth General Ledger report that can be cleanly exported to Excel.
Unlike the General Ledger report that can be extracted via the Reports module in Dynamics GP, a SmartList does not require any additional column formatting after it has been exported to Excel.
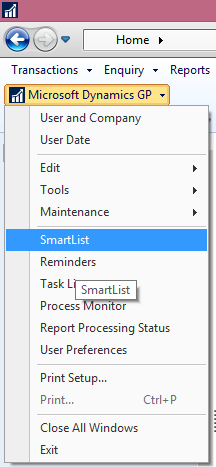
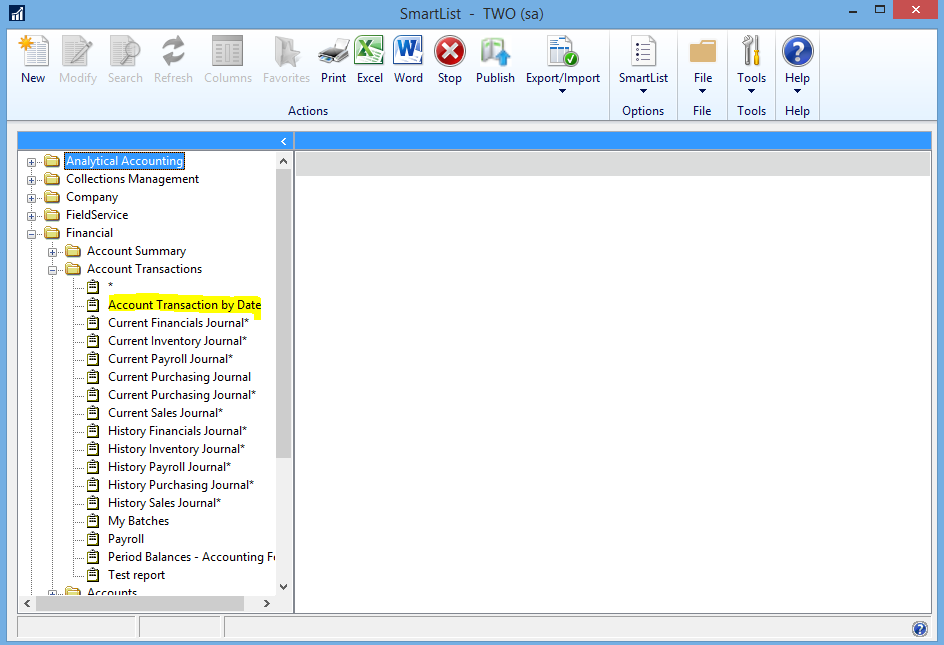
In order to access this list, go into your Dynamics GP solution then click on ‘SmartList’.
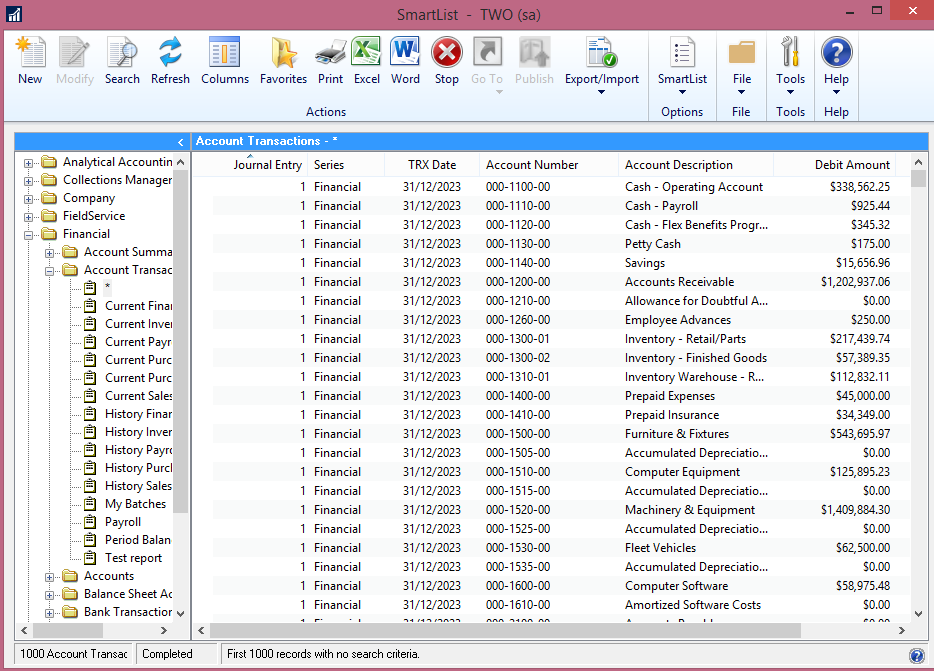
Once here, you will then go to the report list on the left and select ‘Financial’ followed by ‘Account Transactions’ then ‘*’.
Once you are at this point, you can start to edit your list by changing and ordering your columns.
In order to do this, you will need to click on the ‘Columns’ icon which appears in the top ribbon.
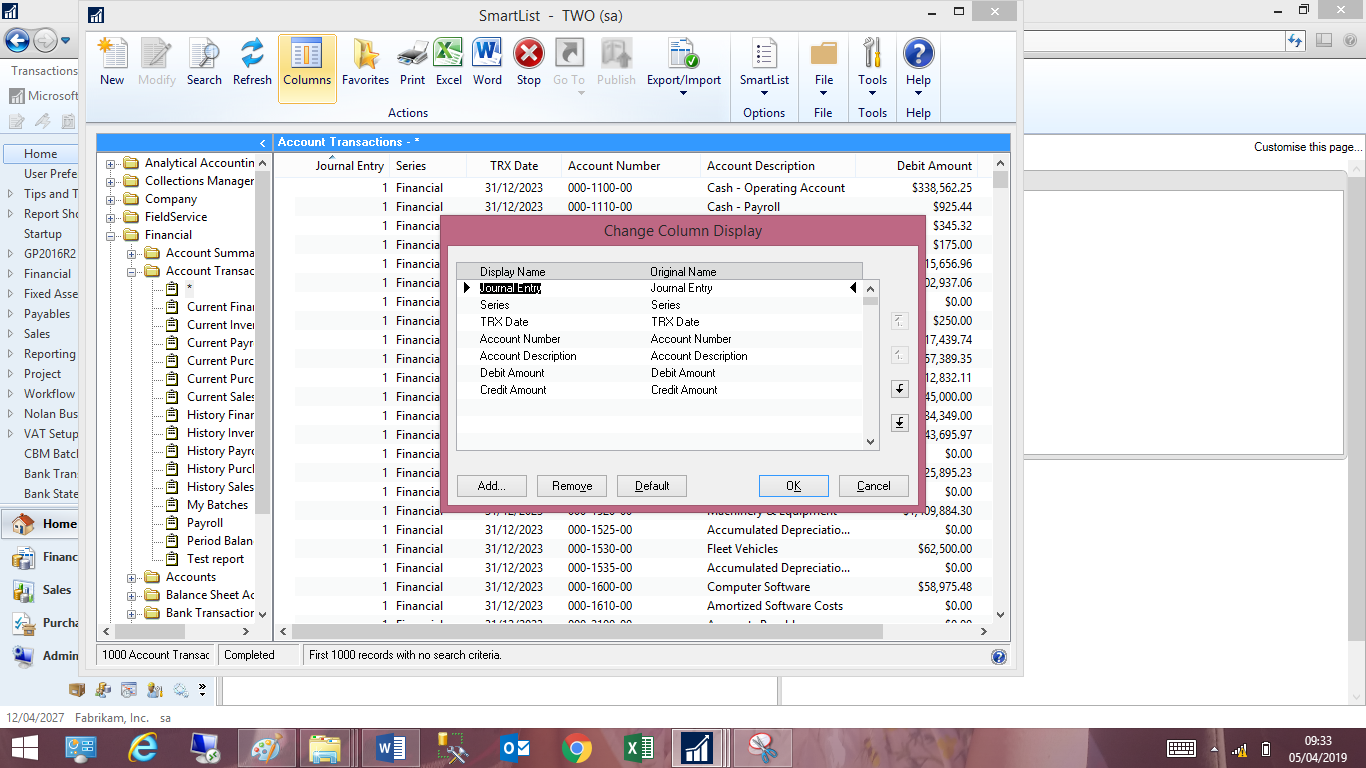
Within the Change Column Display window, you will find that certain columns have already been included with the standard report. From here, click on the ‘Add’ button to look for new columns that you want to include in your list and use the ‘Remove’ button to delete any that you don’t need at all.
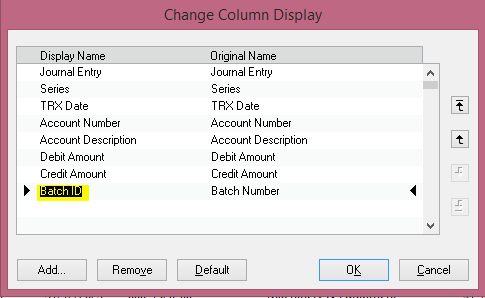
You will find that once you start adding and removing columns, you will be able to select the column name and then use the arrows on the right to change the order of the columns in the list.
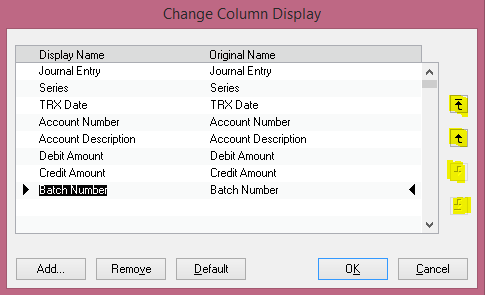
You can also change the Report ‘Display Name’ if required.
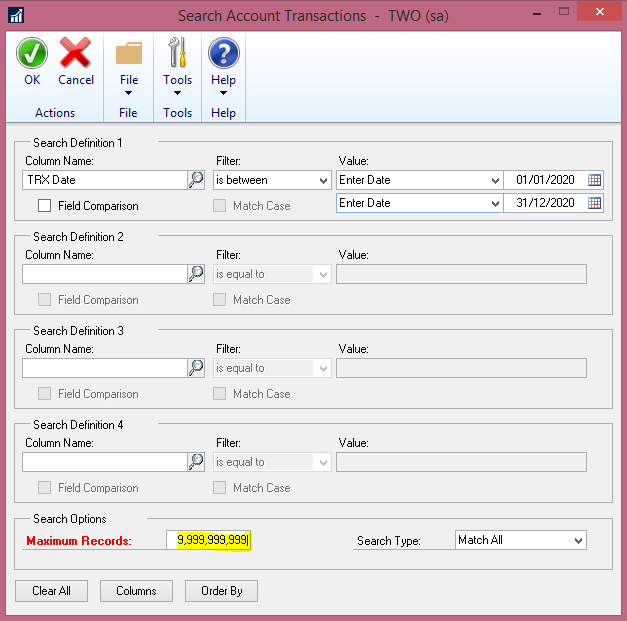
As well as being able to change the columns that are used in the list, you will also be able to use the Search feature to filter the list output for example setting set the date parameters for the posted transactions.
To begin your search, click on the ‘Search’ icon in the top ribbon.
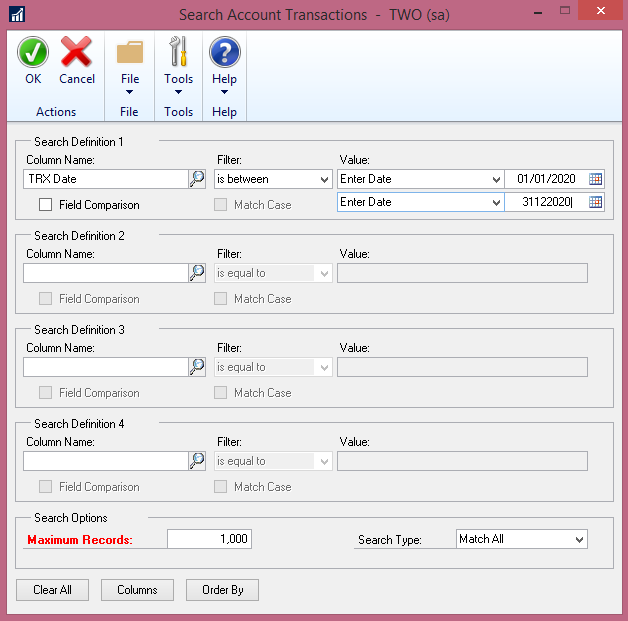
Once the search window opens, pick the field/column to which you want to apply a filter and then pick the filtered value.
Some typical filters include:
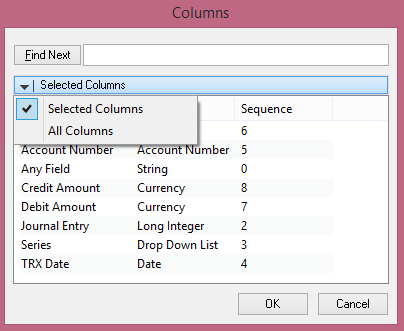
If you want to filter the report based on a column header which is not selected to print on the report, you can do this by clicking on the Selected Columns field and changing your selection pool from ‘Selected Columns’ to ‘All Columns’.
After you have set up your filters, you will then need to the update the ‘Maximum Records’ box with all 9’s, so that all data that matches your filters will be added to your list. If you leave this blank, the default setting will be used that will only return the first 1,000 records that match your criteria.
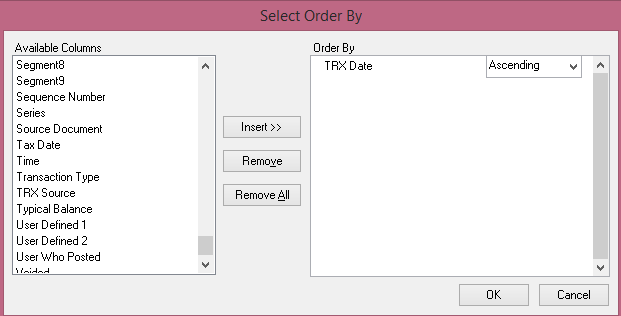
Lastly, if you would like to sort the data in another way, other than the default, transaction ID, simply click on the ‘Order By’ option at the bottom of the Search form.
Next, pick the field (s) that you want to order the list by and select in which way you wish those values to be sorted. After this, simply hit ‘OK’.
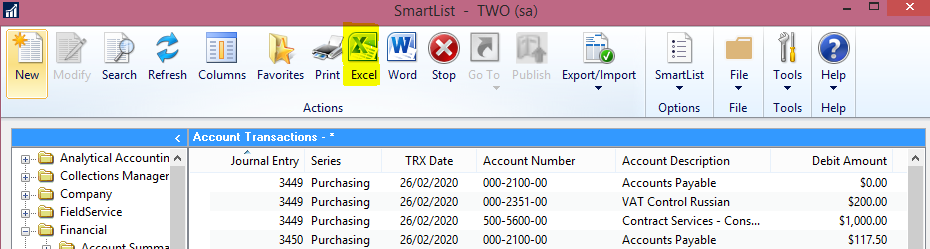
Next, simply hit ‘OK’ on your filtered Search form and you should see your list populate with the transaction data that matches your specified criteria. This report can then be exported out to Excel.
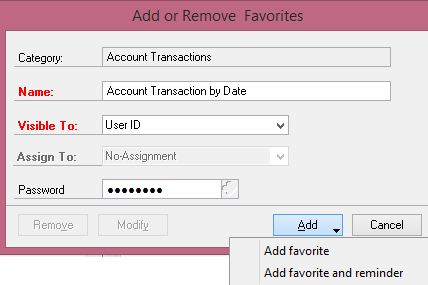
After you have created a SmartList report that gives you the data that you want, make sure that you save it by choosing the ‘Favourites’ option. Enter an appropriate name for your report and then pick who will be able to see it.
You can specify to save the report to ‘System’ so that the report can be seen within SmartLists in all your GP companies, ‘Company’ for just the company you are currently working in, ‘User Class’, so only users in your GP User Class can see the report or ‘User ID’. If you select ‘User ID’, then only you will see the report and it will be added to your ‘My Reports’ section of your GP homepage. If you are using GP 2018 onwards, you can password protect your report, to prevent others making changes to it.
After this simply click ‘Add’ and choose either ‘Favourites’ to add the report to SmartLists or ‘Favourites and Reminder’ to add the report to your homepage reminders as well.
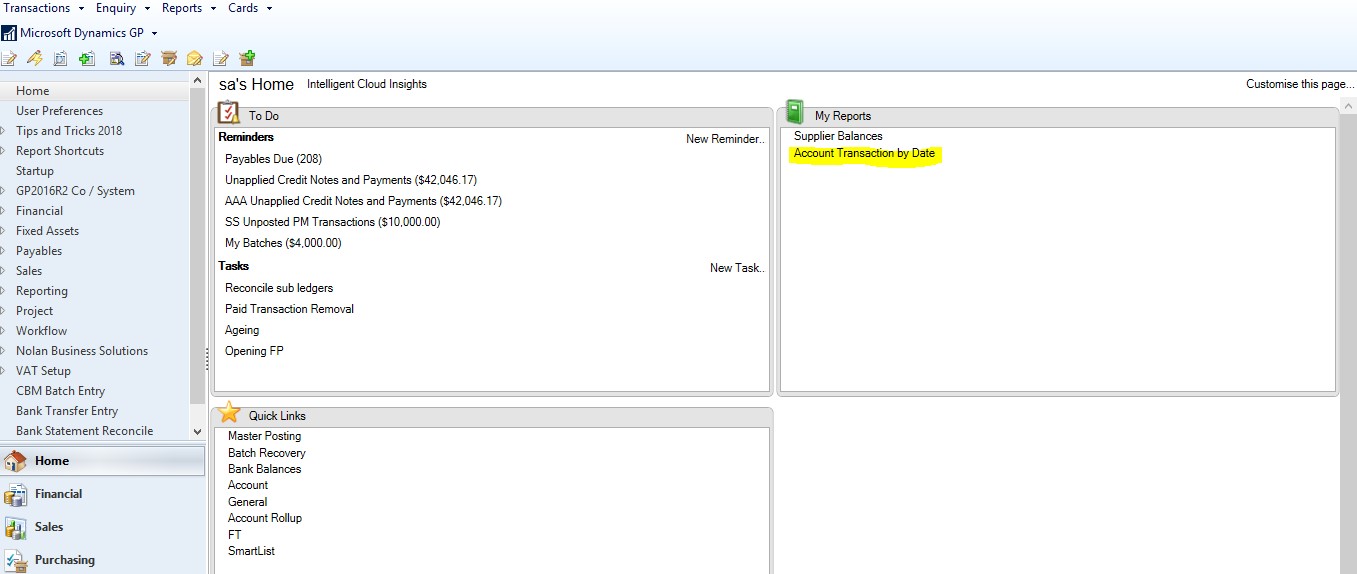
In this example, when you next login to your GP solution to access SmartList, you will find that your custom GL report will be listed under the ‘Account Transaction’ section and on your homepage.
If you are having problems setting up the above in your Dynamics GP solution then why not call our GP experts today who will help you by providing you with bespoke Dynamics GP training or specialist Dynamics GP Support.
Looking to receive more articles like the above? Then why not sign up to our mailing list, where you can get all the latest tips and tricks and much more straight into your inbox.
